
I'm constantly looking for new ways to style our dining room. Our house is a Ranch-style home with an open floor-plan, and when you walk in the front door you see straight on through to our dining room table. Our dining room table is a beautiful piece, given to us by my Dad and Stepmom Cathie.
Unfortunately the table, while beautiful, desperately needs a good stripping and refinishing. I'd like to strip it and give it a more natural, raw "Restoration Hardware" inspired finish. Lately I've been trying to convince Jesse to let me try and refinish it, but there are intricate carvings along the side and on the legs, which can be quite difficult to sand down without ruining. I've looked into quotes on having it professionally done- but it's quite expensive (at least $1,000) and I hate spending money on something we could theoretically do ourselves. In the meantime, I have to get creative on covering the table without it looking sloppy. I've made a number of different table runners and tablecloths, this is by far my favorite.
I absolutely love working with drop cloth. I've made curtains, ottoman slipcovers and countless pillows using drop cloth. Not only is it incredibly affordable (I paid $14.99 for an 8x14 piece), it's durable, machine washable and has a natural, rough linen look that I love and crave.

Here's what you need:
-one long piece of drop cloth (you can find it at any local hardware store) or fabric of your choice, cut to your desired length
- two short but long pieces of drop cloth or fabric. My rule of thumb when making ruffles is to always use 3x the desired length to get a healthy ruffle. (For example, if your runner will be 10 inches wide, you need to have a piece of fabric to ruffle that is 30 inches wide)
see below:

yes, that's my dog's butt in the picture. He was trying to help.
I got lucky and was able to just cut my drop cloth piece as it came in half. Since I wanted a wide runner, the length of my runner was exactly 3x the width. score!
- sewing machine
- pins
-iron
-trim
1.) fold a small fold (approx. 1/2 inch wide) and iron flat. Repeat this step through step 5 on each left and right side of your long main piece, left and right sides and bottoms of your ruffled pieces. The tops of the to-be ruffled pieces and top and bottom of your long piece will be sewn together so we don't need to worry about those.

2.) fold over again and pin to keep in place. These steps are crucial in creating a smooth, durable finished edge.

3.) iron over your second fold

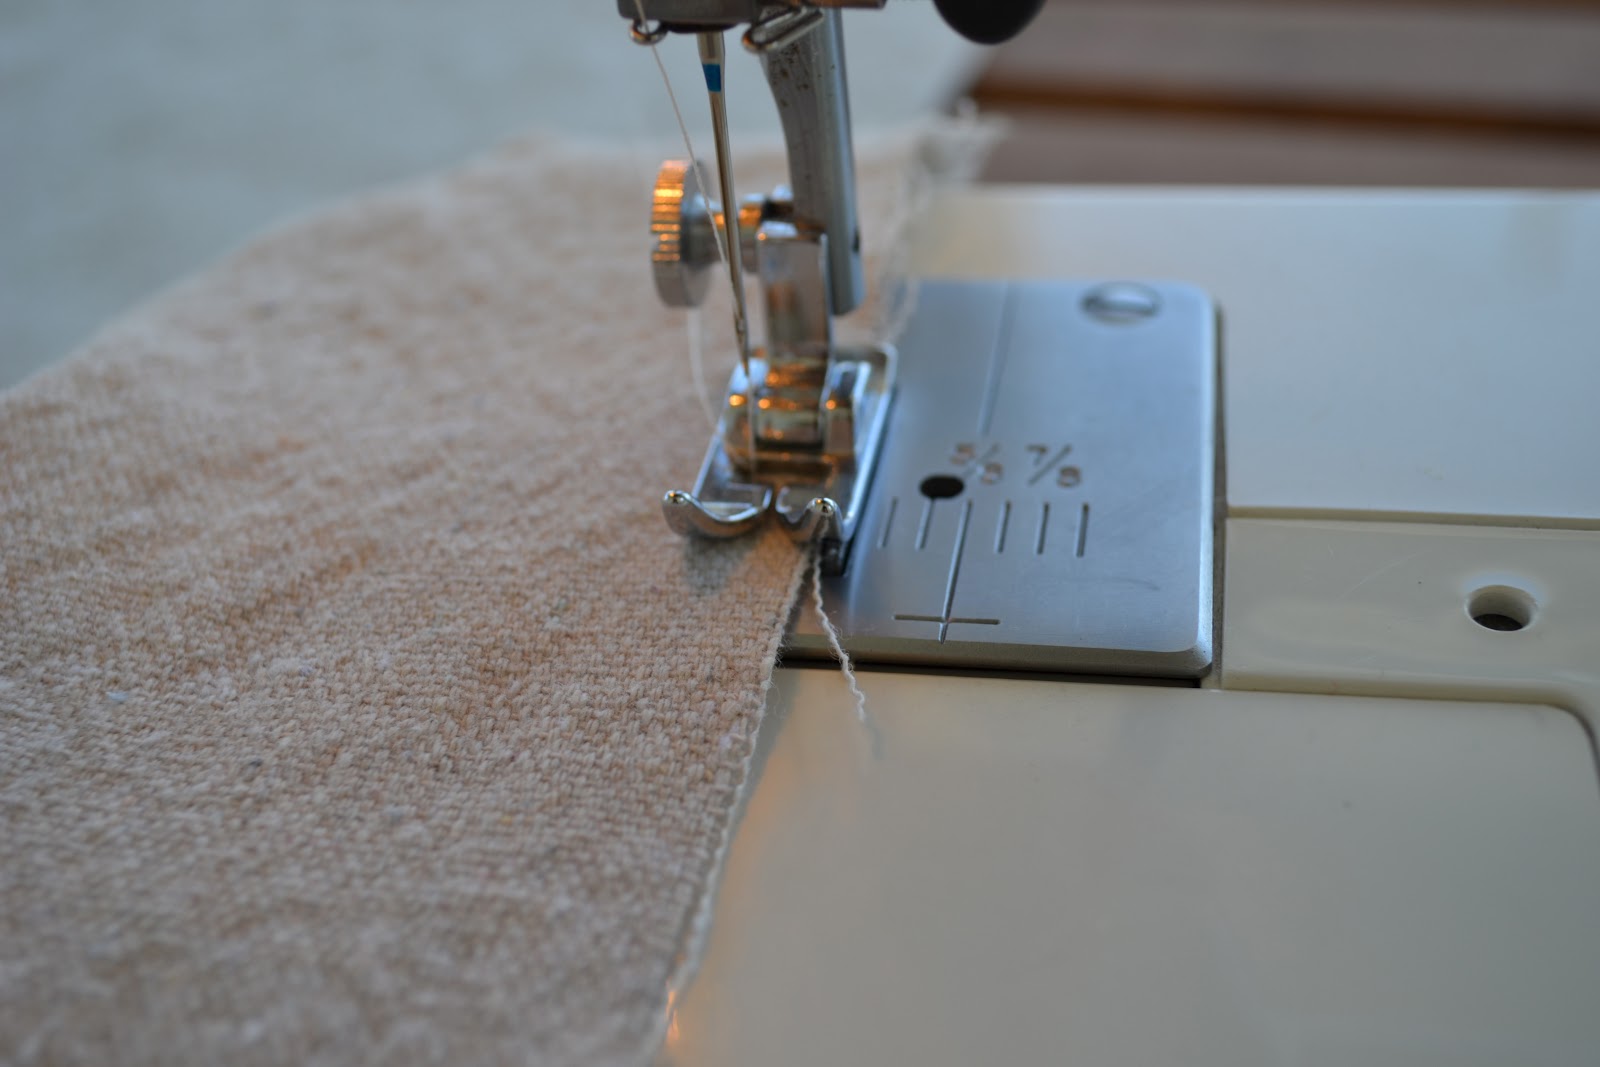
4.) Run a stitch closer to the crease of your fold

5.) Run a second stitch next to the first

6.) Now your finished edges have the superhuman strength of two stitches

Now for the ruffles.
I have an old hand-me-down sewing machine from my Mom that lacks the fancy-pants ruffled setting. I'm keeping it real people.
If yours has a ruffle setting, simple sew a ruffle. If you have a machine like mine, follow the following steps...
7.) Run two stitches on the unfinished tops of your to-be ruffled fabric, set on your widest stitch setting. It's important to run two stitches, because the thread is quite thin and can easily rip as you "scrunch"
8.) pull on the top threads and "scrunch" your fabric to create a ruffle. Scrunch, scrunch, scrunch carefully as to not rip the thread and have to start. all. over.

9.) Once you've scrunched and ruffled each ruffle piece, lay the unfinished ends together with the two "right" sides of each fabric together on the inside and the "wrong" sides outside. Pin in place.

10.) sew the ruffled pieces to your main piece. With my ottoman slipcovers, I found that sewing by hand was much easier, and came out much cleaner that using my sewing machine for this step. This time, I ran a quick basting stitch by hand, and then went over it with my sewing machine. The ruffled thick fabric can get "scrunched" and ruin the ruffles...so use caution.

11.) Apply a trim piece to the seam and cleverly hide any flaws in your sewing skills. Trim pieces are available at most craft stores with self-adhesive, or you can simply glue gun them on.
There you have it.

I added some dried lavender to a vintage enamelware basin for a natural, Spring centerpiece

I'm loving the look. Clean, natural and bright. Just in time for Spring.

until next time,
B
No comments:
Post a Comment